Measuring Instruments and Techniques
From the Measurements in physics curriculum
TL;DR
Measuring in physics means using the right tools and methods to get accurate data. You need to understand how each instrument works, its limitations, and how to read it correctly. Good technique reduces errors and gives you more reliable results.
1. The Mental Model
Think of measuring as translating the physical world into numbers. Each instrument is like a specialized translator, and your technique is how you make sure that translation is as faithful as possible.
2. The Core Material
When you measure something, you're not just grabbing a number; you're interacting with a system. Understanding the measuring instrument involves knowing its range (what it can measure), precision (how fine its scale is), and accuracy (how close its readings are to the true value). Your technique is about minimizing external factors that can mess up your reading.
Reading Scales

Photo by Jessica Lewis 🦋 thepaintedsquare on Pexels
Many instruments, like rulers, vernier calipers, and multimeters, have scales. You need to read the main scale and, if present, the secondary scale (like a vernier scale) correctly. Always read perpendicular to the scale to avoid parallax error.
Vernier Calipers
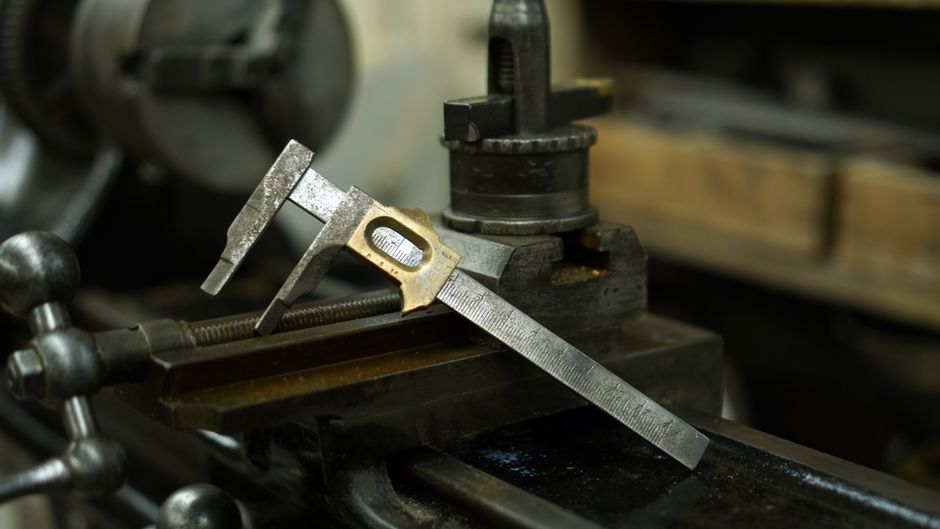
Photo by FFD Restorations on Pexels
Vernier calipers are designed for more precise length measurements than a standard ruler. They have a main scale and a sliding vernier scale.
Here's how to read them:
1. Main Scale Reading (MSR): Find the last complete mark on the main scale that the '0' mark of the vernier scale has passed.
2. Vernier Scale Reading (VSR): Find the mark on the vernier scale that perfectly aligns with any mark on the main scale.
3. Least Count (LC): This is usually marked on the instrument (e.g., 0.01 cm or 0.02 mm). If not, it's (smallest division on main scale) / (total divisions on vernier scale).
4. Total Reading: MSR + (VSR × LC).
Micrometer Screw Gauge

Photo by Michael Orshan on Pexels
For even finer measurements of small lengths (like the diameter of a wire), you use a micrometer screw gauge. It has a main scale (sleeve scale) and a rotating thimble scale.
Here's how to read it:
1. Main Scale Reading (MSR): Read the last visible mark on the main (sleeve) scale. Note both the millimeter marks and any half-millimeter marks (if visible).
2. Thimble Scale Reading (TSR): Find the mark on the thimble scale that aligns with the main scale's horizontal line.
3. Least Count (LC): This is usually 0.01 mm.
4. Total Reading: MSR + (TSR × LC).
Both vernier calipers and micrometers can have zero error. This is when the instrument doesn't read exactly zero when its jaws are closed (caliper) or spindle is touching the anvil (micrometer). You must determine the zero error and subtract it from your reading if it's positive, or add it if it's negative.
* Positive Zero Error: Instrument reads a positive value when it should be zero. Correct Reading = Observed Reading - Positive Zero Error.
* Negative Zero Error: Instrument reads a negative value when it should be zero (it's "behind" zero). Correct Reading = Observed Reading + |Negative Zero Error|.
graph TD
    A["Choose Instrument (e.g., Vernier Caliper)"] --> B["Check for Zero Error"]
    B -- "No Zero Error" --> C["Take Measurement"]
    B -- "Positive Zero Error" --> D["Measure Zero Error Value"]
    B -- "Negative Zero Error" --> E["Measure Zero Error Value"]
    D --> C
    E --> C
    C --> F["Read Main Scale (MSR)"]
    C --> G["Read Secondary Scale (VSR or TSR)"]
    F & G --> H["Calculate Observed Reading (MSR + VSR * LC)"]
    H --> I["Apply Zero Correction"]
    I --> J["Final Corrected Reading"]
Techniques for Reducing Error

Photo by Vie Studio on Pexels
- Repetition: Take multiple readings and calculate the average. This helps reduce random errors.
- Parallax Avoidance: Look directly at the scale, straight on, to avoid reading from an angle.
- Calibration: Ensure the instrument is correctly calibrated before use.
- Controlled Conditions: Keep environmental factors (like temperature for length measurements) constant if they could affect the reading.
3. Worked Example
Let's measure the diameter of a small metal ball using a vernier caliper with a Least Count (LC) of 0.01 cm.
-
Check for Zero Error: When the jaws are closed, the vernier's '0' mark is slightly to the right of the main scale's '0'. The 3rd mark on the vernier scale aligns with a main scale mark.
- Zero Error = + (3 × 0.01 cm) = +0.03 cm.
-
Measure the Ball: We place the ball between the jaws.
- Main Scale Reading (MSR): The '0' of the vernier scale has passed the 1.5 cm mark on the main scale, but not the 1.6 cm mark. So, MSR = 1.5 cm.
- Vernier Scale Reading (VSR): We look for the vernier mark that aligns perfectly with a main scale mark. Let's say the 7th mark on the vernier scale aligns. So, VSR = 7.
- Observed Reading: 1.5 cm + (7 × 0.01 cm) = 1.5 cm + 0.07 cm = 1.57 cm.
-
Apply Zero Correction:
- Correct Reading = Observed Reading - Zero Error
- Correct Reading = 1.57 cm - (+0.03 cm) = 1.54 cm.
So, the diameter of the metal ball is 1.54 cm.
4. Key Takeaways
- Always check the least count and zero error of a measuring instrument before use.
- Read main scales by noting the last full division passed by the zero mark of the secondary scale.
- For vernier scales, find the coinciding division and multiply by the least count.
- For micrometer screw gauges, add the sleeve reading to the thimble reading (aligned division × least count).
- Correct for positive zero error by subtracting it from your observed reading.
- Correct for negative zero error by adding its magnitude to your observed reading.
- Take multiple readings and average them to minimize random errors and improve reliability.
- Avoid parallax error by reading scales directly, not at an angle.
5. Now Try It
Find a ruler, a small object (like a coin or a paperclip), and if you have one, a vernier caliper or a micrometer screw gauge. Measure the length/diameter of the object using each instrument you have. For the vernier/micrometer, carefully determine its least count and check for zero error before you measure the object. Then, take three readings for your object and calculate the average. What differences do you notice between the measurements taken by different instruments?
Frequently asked about Measuring Instruments and Techniques
Study this next
Get the full Measurements in physics curriculum
Clone the complete plan to your dashboard for unlimited AI-generated notes, practice quizzes, and a personalised revision schedule.
Save this course free