Material Testing: Cement, Concrete, Bitumen, and Steel
From the surveying-ii, surveying-ii practice and plotting, material testing laboratory, construction management and entrepreneurship curriculum
TL;DR
Material testing ensures construction materials like cement, concrete, bitumen, and steel meet specified quality standards. These tests verify physical and mechanical properties, guaranteeing durability and safety in structures. Understanding these tests is crucial for both quality control and troubleshooting potential material failures.
1. The Mental Model
Think of material testing as a doctor checking a patient's vital signs. You're not just looking for a heartbeat, but ensuring all key indicators (strength, consistency, purity) are within a healthy range for the material to perform its intended job reliably.
2. The Core Material
In construction, the reliability of materials directly impacts the safety and longevity of a structure. That's why rigorous testing of key materials like cement, concrete, bitumen, and steel is indispensable. Each material has specific properties that need verification through standardized tests.
Cement Testing
Cement is the binder in concrete. Its quality directly influences concrete strength.
* Fineness Test: Measures particle size, affecting hydration rate and strength development. Often done with a Sieve Analysis or Blaine Air Permeability test. Finer cement hydrates faster, giving earlier strength but can also increase water demand.
* Consistency Test: Determines the amount of water needed to form a paste of standard consistency. This is crucial for concrete mix design. The Vicat apparatus is commonly used.
* Setting Time Test: Measures initial and final setting times using the Vicat apparatus. Initial setting time tells you when concrete starts to lose its plasticity, while final setting time indicates when it has hardened sufficiently to resist definite pressure.
* Soundness Test: Checks for volume changes (expansion) after hardening, caused by excessive free lime or magnesia, which can lead to cracking. The Le Chatelier method or Autoclave test is used.
* Compressive Strength Test: Measures the strength of hardened cement mortar cubes (e.g., 7-day and 28-day strength).
Concrete Testing
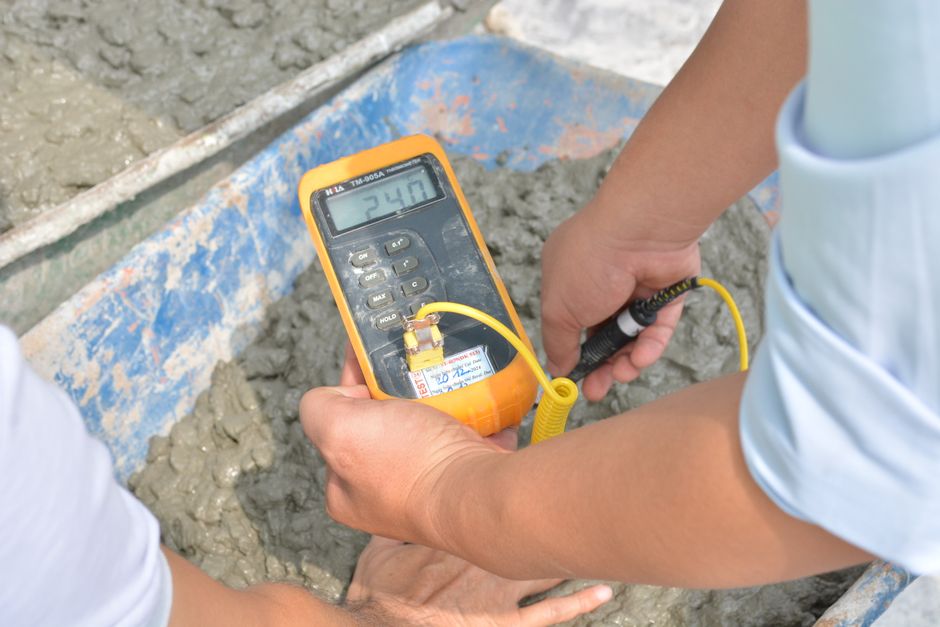
Photo by SÀI GÒN CÔNG TY CP SẢN XUẤT - THƯƠNG MẠI on Pexels
Concrete is the final product made from cement, aggregates, and water.
* Slump Test: Measures the workability (consistency) of fresh concrete. A higher slump generally means more workable concrete, but too high can indicate excessive water or poor aggregate grading.
* Compressive Strength Test: The most common test, conducted on concrete cubes or cylinders after 7, 14, or 28 days of curing. This determines the concrete's ability to resist crushing loads.
* Flexural Strength Test (Beam Test): Measures the concrete's ability to resist bending forces, important for pavements and slabs.
* Split Tensile Strength Test: Indirectly measures the tensile strength of concrete, which is typically much lower than its compressive strength.
* Non-Destructive Tests (NDT): Examples include the Rebound Hammer test and Ultrasonic Pulse Velocity (UPV) test, used to assess hardened concrete quality without damaging it.
Bitumen Testing
Bitumen is a binder used in asphalt mixes for roads. Its properties significantly affect pavement performance.
* Penetration Test: Measures the hardness or consistency of bitumen by determining the depth a standard needle penetrates under specified load, time, and temperature. Higher penetration indicates softer bitumen.
* Ductility Test: Measures the elongation of a bitumen sample before breaking, indicating its ability to deform without cracking.
* Softening Point Test (Ring and Ball): Determines the temperature at which bitumen reaches a specific consistency (softens). Important for knowing how bitumen performs at high service temperatures.
* Flash and Fire Point Test: Identifies the minimum temperature at which bitumen vapors ignite (flash point) and sustain burning (fire point), crucial for safety during heating and mixing.
* Viscosity Test: Measures the resistance to flow, important for handling and pumping bitumen.
Steel Testing

Photo by Sternsteiger Stahlwaren on Pexels
Steel reinforcement bars (rebar) are critical for providing tensile strength to concrete structures.
* Tensile Strength Test: The most important test, it measures the ultimate tensile strength (UTS), yield strength, and percentage elongation. Yield strength is when the steel starts to deform permanently, and UTS is the maximum stress it can withstand before breaking.
* Bend/Rebend Test: Checks the ductility and soundness of the steel. The bar is bent to a specified angle and then, for rebend, straightened again to check for cracks.
* Chemical Composition Test: Verifies the percentages of carbon, manganese, sulfur, phosphorus, etc., as these elements significantly affect steel's mechanical properties and weldability.
Here's a simplified flow for concrete production and testing:
graph TD
    A["Raw Materials (Cement, Aggregates, Water)"] --> B["Mix Design (Proportions)"];
    B --> C["Mixing Concrete"];
    C --> D{"Fresh Concrete Tests?"};
    D -- "Yes" --> E["Slump Test"];
    D -- "No / Pass" --> F["Casting Specimens (Cubes/Cylinders)"];
    F --> G["Curing (7, 14, 28 Days)"];
    G --> H{"Hardened Concrete Tests?"};
    H -- "Yes" --> I["Compressive Strength Test"];
    H -- "No / Pass" --> J["Structural Use"];
    I --> K["Quality Control / Acceptance"];
    K --> J;
3. Worked Example
Let's say you're testing concrete for a beam. You need to verify its workability and 28-day compressive strength.
-
Slump Test (Fresh Concrete):
- You fill a standard slump cone (300mm high) with fresh concrete in three layers, rodding each layer.
- You lift the cone carefully.
- The concrete slumps. You measure the difference between the height of the cone and the highest point of the slumped concrete.
- Result: You measure a slump of 75mm. For your particular beam, the specification requires a slump between 50mm and 100mm for good workability and placement. Result: Pass.
-
Compressive Strength Test (Hardened Concrete):
- You cast three 150mm x 150mm x 150mm concrete cubes from the same batch.
- You cure them in water for 28 days under controlled temperature.
- On the 28th day, you place each cube in a Compression Testing Machine (CTM).
- You apply a gradual load until the cube fails (crushes).
- The CTM records the maximum load (e.g., 450 kN for one cube).
- Calculation: Compressive Strength = Load / Area.
- Area of cube face = 150mm x 150mm = 22,500 mm² = 0.0225 m².
- Strength = 450 kN / 0.0225 m² = 20,000 kPa = 20 MPa.
- You do this for all three cubes and take the average (e.g., 20 MPa, 21 MPa, 19 MPa, average = 20 MPa).
- Result: The project specification requires a minimum 28-day compressive strength of 25 MPa. Result: Fail. This concrete batch is rejected, and further investigation into the mix design or materials is needed.
4. Key Takeaways
- Material testing is vital for ensuring the quality, safety, and longevity of construction projects.
- Each material (cement, concrete, bitumen, steel) has specific, standardized tests to verify its key properties.
- Workability (slump) and compressive strength are fundamental tests for concrete.
- Penetration and softening point are crucial for characterizing bitumen properties.
- Tensile strength and ductility are primary indicators of steel's performance.
- Understanding test results allows for informed decisions on material acceptance or rejection.
- Regular testing helps identify issues early, preventing costly failures down the line.
Common Mistakes to Avoid:
- Not understanding the why behind a test: Don't just perform tests; understand what property each test measures and why it's important.
- Improper sample preparation or curing: This can lead to highly inaccurate and misleading test results.
- Ignoring ambient conditions: Temperature and humidity significantly affect many material properties and test outcomes.
- Failing to calibrate equipment: Uncalibrated testing machines will give unreliable results, rendering tests useless.
- Not documenting results thoroughly: Poor record-keeping makes it impossible to track material quality or troubleshoot problems.
5. Now Try It
Imagine you've received a new batch of rebar for a critical concrete column. Your task is to ensure it meets the minimum tensile strength requirements. You have a universal testing machine (UTM) at your disposal.
What to do:
1. Describe the steps you would take to prepare a rebar sample for a tensile strength test.
2. Explain what key values you would obtain from the UTM during the test (e.g., load at yield, maximum load).
3. How would you calculate the yield strength and ultimate tensile strength from these values?
4. What would constitute "success" for this rebar in terms of meeting a specification (e.g., minimum yield strength of 415 MPa)?
What success looks like: You should be able to clearly outline the physical preparation, the data points collected, the formulas used for calculation, and the criteria for judging whether the rebar passes or fails based on a given specification.
Frequently asked about Material Testing: Cement, Concrete, Bitumen, and Steel
Study this next
Get the full surveying-ii, surveying-ii practice and plotting, material testing laboratory, construction management and entrepreneurship curriculum
Clone the complete plan to your dashboard for unlimited AI-generated notes, practice quizzes, and a personalised revision schedule.
Save this course free