Introduction to Docker and Containerization
From the Make notes on docker an GitHub curriculum
TL;DR
Docker packages an application and everything it needs — code, libraries, system tools — into a single portable unit called a container. Containers run consistently on any machine with Docker installed, ending the "it works on my machine" problem. You'll learn how containers differ from virtual machines, how Docker's architecture fits together, and how to build your own image with a Dockerfile.
1. The Mental Model
Think of a container as a sealed lunchbox: everything your app needs to run is packed inside it, so it tastes the same wherever you open it. A virtual machine is more like shipping the entire kitchen — stove, fridge, and all — just to make one sandwich. Docker gives you the lunchbox approach: lightweight, fast to start, and identical everywhere. A container is your app plus its dependencies, isolated from the host but sharing its kernel.
2. The Core Material
2.1 Containers vs Virtual Machines

Photo by Anna Hinckel on Pexels
A virtual machine (VM) virtualizes hardware. Each VM runs a full guest operating system on top of a hypervisor, which sits on the host OS. That means every VM carries its own kernel, its own copy of system libraries, and boots in tens of seconds to minutes. A typical VM image is gigabytes in size.
A container virtualizes the operating system, not the hardware. Containers share the host machine's kernel but isolate the application's filesystem, processes, and network using Linux kernel features called namespaces (isolation) and cgroups (resource limits — CPU, memory). Because there's no second kernel to boot, containers start in milliseconds and images are typically tens to hundreds of megabytes.
| Virtual Machine | Container | |
|---|---|---|
| Isolation unit | Full OS (own kernel) | Process (shared host kernel) |
| Boot time | Seconds to minutes | Milliseconds |
| Typical size | GBs | MBs |
| Density per host | Few dozen | Hundreds |
| Isolation strength | Very strong (hardware-level) | Good, but weaker than a VM |
This is why teams increasingly run containers inside VMs in the cloud: the VM gives strong security isolation between tenants, and containers inside it give fast, lightweight app packaging.
2.2 Docker Architecture: Client, Daemon, Images, Registries
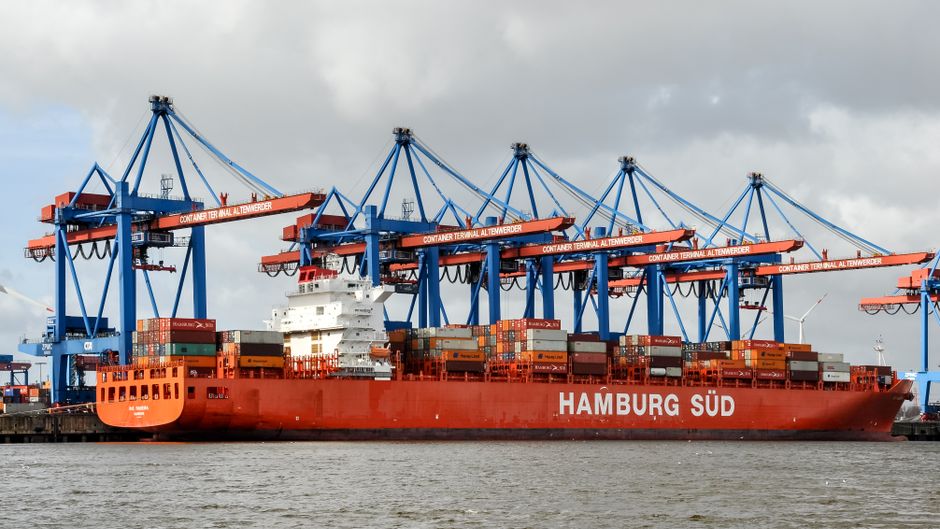
Photo by Wolfgang Weiser on Pexels
Docker uses a client-server model with four main pieces:
- Docker Client (
dockerCLI): the tool you type commands into (docker run,docker build). - Docker Daemon (
dockerd): a background process that does the actual work — building images, running containers, managing networks and volumes. It listens for API requests from the client. - Images: read-only templates built from a set of instructions (a Dockerfile). An image is like a class in object-oriented programming.
- Containers: a running (or stopped) instance of an image — like an object instantiated from that class. You can run many containers from one image.
- Registry (e.g. Docker Hub, GitHub Container Registry): a remote store for images, where you
pushimages to share them andpullthem to run elsewhere.
flowchart LR
    Dev["Developer runs: docker build"] --> Client["Docker Client (CLI)"]
    Client -->|REST API call| Daemon["Docker Daemon (dockerd)"]
    Daemon -->|creates| Image["Image (read-only layers)"]
    Image -->|docker run| Container["Running Container"]
    Daemon -->|docker push| Registry["Registry (Docker Hub / GHCR)"]
    Registry -->|docker pull| Daemon
When you run docker run nginx, the daemon checks if the nginx image exists locally. If not, it pulls it from the registry, then creates a writable container layer on top of the image's read-only layers, and starts a process inside an isolated namespace.
2.3 Building Images with a Dockerfile and Layers

Photo by Kunno Jayson on Pexels
A Dockerfile is a text file of instructions that Docker reads top-to-bottom to build an image. Each instruction creates a new layer — a diffable, cacheable filesystem snapshot. Layers are stacked and shared across images, which is why Docker builds are fast after the first run and why images with common base layers (like node:18) don't duplicate storage.
Key instructions:
- FROM — sets the base image (must be the first instruction)
- WORKDIR — sets the working directory inside the container
- COPY — copies files from your machine into the image
- RUN — executes a command at build time (e.g. installing dependencies), creating a new layer
- EXPOSE — documents which port the container listens on (doesn't actually publish it)
- CMD — the default command run when the container starts
Layer caching matters: Docker reuses a cached layer if the instruction and its context haven't changed. This is why you should COPY package.json and run npm install before copying the rest of your source code — your dependencies rarely change, but your code does, so you avoid re-installing packages on every code edit.
3. Worked Example
Let's containerize a tiny Node.js web server, from source code to a running container.
Step 1 — the app (index.js):
const http = require('http');
const server = http.createServer((req, res) => {
  res.writeHead(200, { 'Content-Type': 'text/plain' });
  res.end('Hello from inside a container!\n');
});
server.listen(3000, () => console.log('Server running on port 3000'));
Step 2 — the Dockerfile:
# Base image with Node.js pre-installed
FROM node:18-alpine

# Set working directory inside the container
WORKDIR /app

# Copy only dependency files first (layer caching)
COPY package*.json ./
RUN npm install --omit=dev

# Now copy the rest of the source code
COPY . .

# Document the port the app listens on
EXPOSE 3000

# Default command when container starts
CMD ["node", "index.js"]
Step 3 — build the image:
docker build -t hello-container:1.0 .
Expected output ends with something like:
=> exporting to image
=> => naming to docker.io/library/hello-container:1.0
Step 4 — run the container, mapping host port 8080 to container port 3000:
docker run -d -p 8080:3000 --name my-app hello-container:1.0
-d runs it detached (in the background), -p publishes the port, --name gives it a friendly name.
Step 5 — verify:
curl http://localhost:8080
# Hello from inside a container!
docker ps
# shows my-app as Up
docker logs my-app
# Server running on port 3000
Step 6 — push to a registry so others (or GitHub Actions) can pull it:
docker tag hello-container:1.0 ghcr.io/yourname/hello-container:1.0
docker push ghcr.io/yourname/hello-container:1.0
Notice the whole lifecycle: write code → build image (layers created, cached on rebuild) → run container (isolated process, mapped port) → push to registry (shareable anywhere Docker runs).
4. Production Pitfalls & Best Practices
4.1 Real-World Best Practices

Photo by Yoga Vidya Mandiram on Pexels
- Use small base images. Prefer
node:18-alpineorpython:3.12-slimover full OS images — smaller attack surface and faster pulls. - Order Dockerfile instructions by change frequency. Put rarely-changing steps (installing dependencies) before frequently-changing ones (copying source) to maximize cache hits.
- Use multi-stage builds to keep final images lean — compile/build in one stage, copy only the output into a minimal runtime stage.
- Never bake secrets into images. Use environment variables or Docker secrets at runtime, never
COPY .envor hardcoded API keys in a Dockerfile. - Pin versions. Use
node:18.19.0-alpineinstead ofnode:latestso builds are reproducible months later. - Add a
.dockerignorefile (like.gitignore) to excludenode_modules,.git, and build artifacts from the build context — speeds up builds and avoids leaking files. - Run as a non-root user inside the container for security, using
USERin the Dockerfile.
4.2 Common Bugs & Anti-Patterns
1. Copying everything before installing dependencies (breaks caching):
# BAD — any code change invalidates the npm install cache
COPY . .
RUN npm install
# FIXED — dependency layer only rebuilds when package.json changes
COPY package*.json ./
RUN npm install
COPY . .
2. Using latest tag in production:
# BAD — unpredictable, could break silently on rebuild
FROM node:latest
# FIXED — reproducible build
FROM node:18.19.0-alpine
3. Forgetting to expose/publish the port, then wondering why curl fails:
# BAD — container runs but nothing is reachable from the host
docker run -d hello-container:1.0
# FIXED — explicitly map host:container ports
docker run -d -p 8080:3000 hello-container:1.0
4. Giant images from unnecessary build tools:
# BAD — ships compilers and build tools in the final image
FROM node:18
RUN npm install && npm run build
CMD ["node", "dist/server.js"]
# FIXED — multi-stage build, final image has no build tools
FROM node:18 AS builder
WORKDIR /app
COPY . .
RUN npm install && npm run build

FROM node:18-alpine
WORKDIR /app
COPY --from=builder /app/dist ./dist
CMD ["node", "dist/server.js"]
4.3 When to Use What (Decision Matrix)
| Situation | Recommended Approach |
|---|---|
| Need strong isolation between untrusted tenants | Virtual Machine (or container + VM combo, e.g. Firecracker) |
| Packaging a single app for consistent deployment | Docker container |
| Compiled language needing build tools only at build time | Multi-stage Dockerfile |
| Sharing images across a team or with CI/CD | Push to a registry (Docker Hub, GHCR, ECR) |
| Local development matching production exactly | docker-compose with the same images used in prod |
| App needs persistent data across container restarts | Docker volumes, not the container's writable layer |
5. Now Try It
Right here, without leaving this page: write out the full Dockerfile for a Python Flask app with this structure — app.py (your code), requirements.txt (dependencies), base image python:3.12-slim, dependencies installed before code is copied, app listening on port 5000, and running as a non-root user (hint: use RUN adduser and USER). Then write the three CLI commands you'd run in order to build the image as flask-demo:1.0, run it mapping host port 9000 to container port 5000, and check its logs.
Success looks like: you have a complete, correctly-ordered Dockerfile (dependencies before code copy, non-root USER line included) plus the three correct docker build, docker run -p, and docker logs commands, without needing to check documentation.
Frequently asked about Introduction to Docker and Containerization
More from Make notes on docker an GitHub
Get the full Make notes on docker an GitHub curriculum
Clone the complete plan to your dashboard for unlimited AI-generated notes, practice quizzes, and a personalised revision schedule.
Save this course free